Back to the overview
The Workflow association controls for which target object Workflows will be executed. With the button ![]() you came to the Association-Editor.
you came to the Association-Editor.
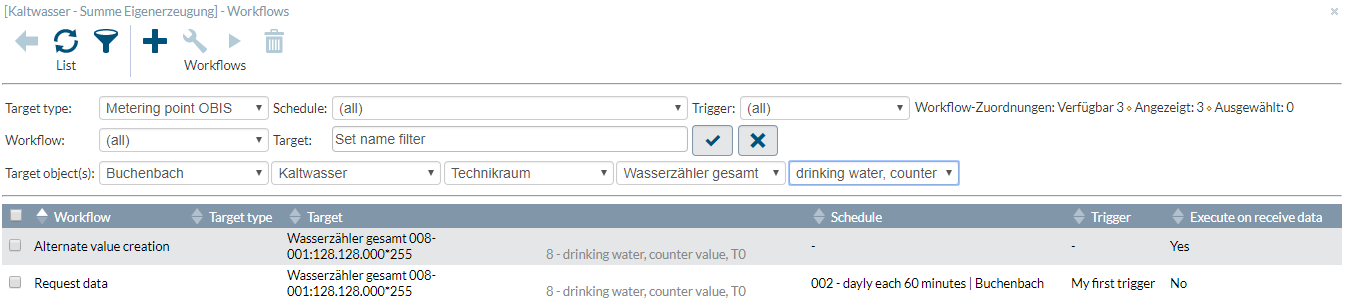
The filter section below the toolbar is displayed on start and configured that all Workflows are listed, which are associated to the target object.
Add and associate Workflow
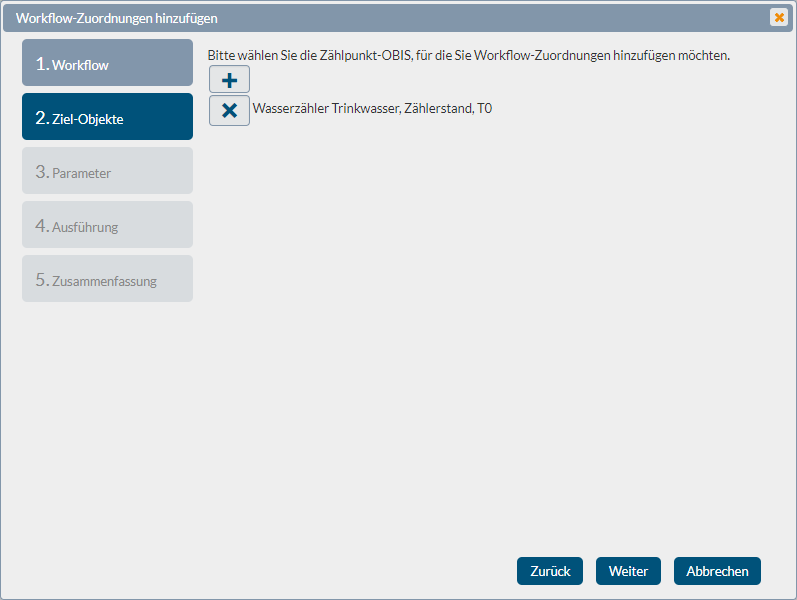
- Make sure, that the desired target object is selected. For example, should energy data be requested for a particular OBIS measured value via Workflow, then select the Meteringpoint first, then the OBIS measured value and then click on the button
 to display the Association-Editor.
 - Use the button
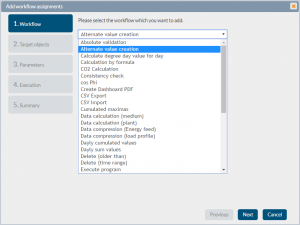
 call the assistant. Select the desired Workflow from the list, Please note, that only Workflows can be shown, which are appropriate for the current target.
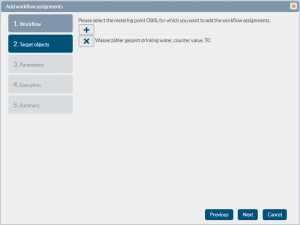
- Confirm the used target type. You can add multiple associations with this assistant. Here you can choose and add the respective target object e.g. Meteringpoint.
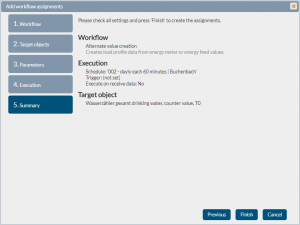
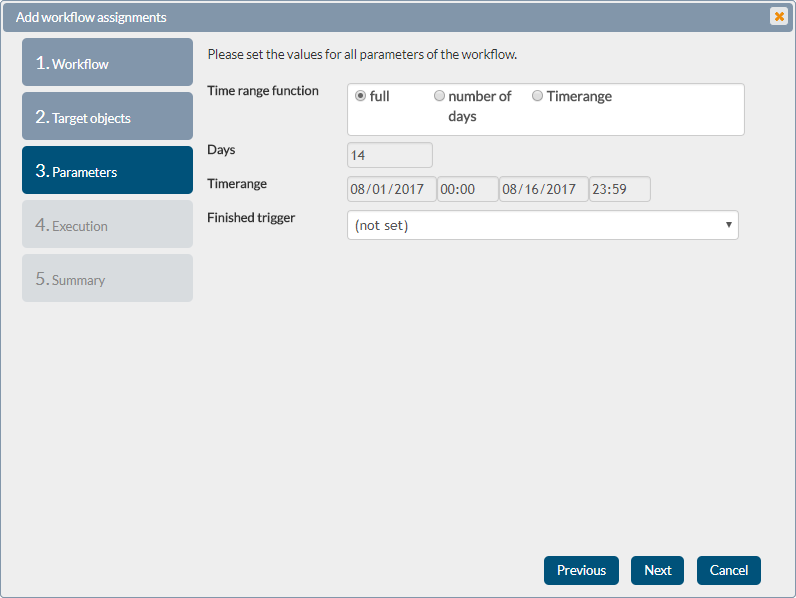
- In the next step you can set the individual Workflow parameters.

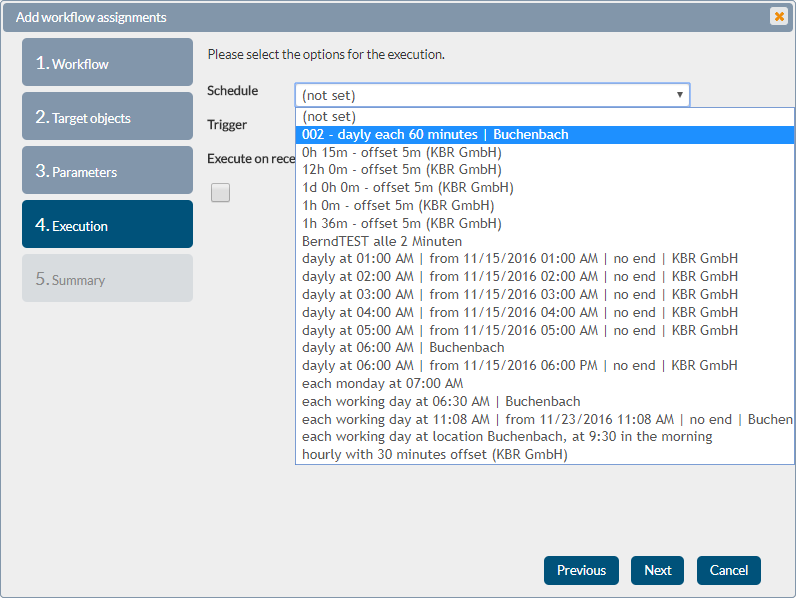
- After this, the start can be selected with existing Schedule or an existing Trigger.

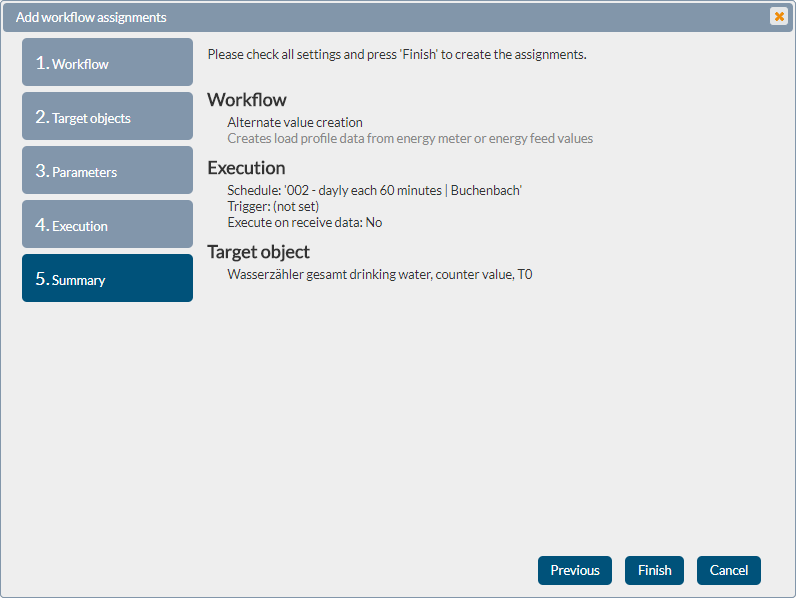
- At the end, your settings will displayed. Check these and save the association.

